

How to fill holes in walls so they disappear under paint
Every wall has them. Old screw holes from the last owner’s pictures, a dent where the door handle hits, a crack that appeared over the winter. Learning how to fill holes in walls properly is one of the first jobs I’d teach anyone with a new home, because once you can do it, you stop worrying about putting things up. Make a mistake, and you just fill it.
Grab a tub, a filling knife and a bit of sandpaper, and I’ll walk you through it. There’s a short video of me doing it further down if you’d rather watch.
What you need to fill holes in walls
- Fine filler. A fine surface filler is what you want for small holes and dents. Toupret and Gyproc are my favourite brands. Despite its popularity, I really don’t rate Polyfilla. Ready-mixed tubs are handy for one or two holes. Powder is cheaper and better if you’ve got a lot to do.
- A mixing tub (an old plastic container is fine).
- A scraper for mixing. It’s stiffer, so it’s easier to work the powder with.
- A flexible filling knife for putting the filler on the wall. This is not the same as a scraper, and it makes a big difference.
- 240 grit sandpaper and a cork sanding block.
- A damp cloth and a dust sheet.
Step 1: Get the hole ready
Brush out any loose bits and dust. If there’s an old wall plug in the hole, pull it out with pliers, or push it just below the surface with a screwdriver so it doesn’t stick out. Any loose, flaky paint around the edge wants scraping back to something solid. Filler won’t stick properly to dust or loose paint.
Step 2: Mix the filler (if you’re using powder)
Powder in first, then add water a little at a time. It’s surprising how little water you need. If you add too much, don’t worry. Just add a bit more powder and keep going.
Use the scraper and press the mix against the side of the tub. That works the water in and squashes out the lumps. You’re after the consistency of toothpaste: smooth, no lumps, and it holds its shape on the knife.
Only mix what you’ll use in the next 20 minutes or so, because it starts to set in the tub.

Step 3: Push it in, then spread it out
This is where the filling knife earns its keep.
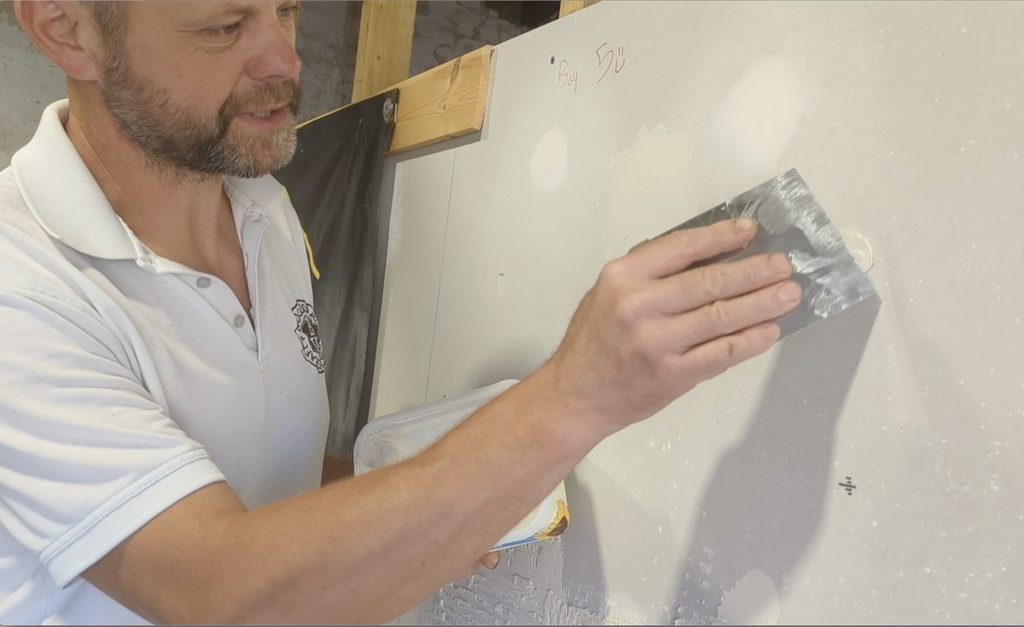
- Take a small amount on the end of the knife and push it into the hole first. Hold the knife fairly upright so it acts like a scraper and forces the filler in deep.
- Then flex the blade and spread the filler across and beyond the hole, so it covers a little more than the damage.
- Don’t overwork it. A couple of passes is plenty. The more you fiddle, the more lines and ridges you leave, and every ridge is something you’ll have to sand off later.
Leave it very slightly proud of the wall (just above the surface). Filler shrinks a little as it dries, and you’ll sand it flat anyway.
Deep holes: fill them in layers. Put some in, let it dry, then add the next layer. One thick blob tends to sag or crack.

Step 4: Let it dry
Check the time on the tub. Thin fills are often dry in an hour or two, but deeper ones need longer. It should feel hard and look an even, lighter colour all over before you sand.
Step 5: Sand it smooth
Wrap 240 grit paper round a cork block. The cork gives a little, so it follows the wall and is easier to hold than paper on its own.
Work in small circles from the middle outwards, then bigger circles, blending the edges of the filler into the wall. Run your fingertips over it with your eyes closed. If you can’t feel the edge of the patch, you’re done. If you can, sand a bit more, or add a thin skim of filler and repeat.
Wipe the dust off with a barely damp cloth.

Step 6: Prime before you paint
Don’t skip this one. Bare filler soaks up paint differently from the wall around it, so the patch shows through as a dull spot even after two coats. Dab on a coat of primer, or a watered-down coat of your emulsion, over each filled patch first. Then paint the wall as normal.
What about cracks?
Small, fine cracks in plaster (the hairline ones you often see in new homes, or round the ceiling edge) can be filled the same way. Rake the crack out a little with the corner of your scraper if it’s not solid, so the filler has something to grip, brush out the dust, then fill and sand as above. A flexible decorator’s filler is worth using on cracks that keep coming back where the wall meets the ceiling.
When to call someone in: if a crack is wider than about 5 mm, runs diagonally from the corners of windows or doors, looks like a staircase in brickwork, or keeps getting bigger, don’t just fill it. Those can be signs the building is moving, and you want a builder or surveyor to have a look first. Filling it only hides the problem.
Big holes in plasterboard (a fist or a door handle through the wall) need a patch rather than filler on its own. That’s a different job, and one we practise in the workshop.
Watch me do it
Common questions
Can I fill holes in walls without sanding? You can get close by smoothing the filler with a damp filling knife as it starts to firm up, but a light sand is what makes a patch disappear under paint. It’s worth the five minutes.
What’s the best filler for screw holes? Any fine surface filler. For a few small holes, a ready-mixed tub is easiest. For a whole room, powder works out cheaper and you can mix it to suit.
Why can I still see the patch after painting? Usually it’s either a ridge you can feel (sand it again) or bare filler that wasn’t primed. Spot-prime the patch, then repaint.
How do I fill a hole where a wall plug was? Pull the plug out with pliers if you can, or push it just below the surface, then fill over it as normal.
Learn it hands-on
Reading about it only gets you so far. Filling and sanding is one of those jobs where it really helps to have someone watching your hands and telling you when the mix is right.
It’s exactly what we do over Day 1 and Day 2 of our DIY Course in Lincoln. You’ll fill a wall on Day 1, leave it to dry overnight, then sand and finish it on Day 2. Along the way, Day 1 (Basic DIY Course) covers choosing and using your tools, and Day 2 (Basic DIY & Tiling) covers putting a shelf up straight, tiling and grouting, all on our practice walls in the workshop. It’s £170 a day, or £300 for both days, 9am to 4pm.
Book with a friend or partner on the same booking and you’ll get 10% off automatically. Tools, safety kit and materials are provided. Bring your own lunch.
Next dates: Day 1 on Tuesday 17 November, Day 2 on Wednesday 18 November, then the week of Tuesday 12 January 2027.

Leave a Reply